Our Workflow
Planning is crucial for construction of synthetic biological systems. The workflow described in Figure 1 acted to guide us during the competition. The first step was to identify source genomes containing our genes of interest. Our primary supervisor Dr. Stuart was able to identify these sources; E. coli BL21 and B. Subtilis for Hpa and BMD respectively. Next was primer design for the amplification of our gene fragment. This was a complicated process; requiring primers which simultaneously domesticated our parts, added golden gate cloning overhangs, and created compatible gibson fragments. After amplification we performed Gibson (integrated part fragments as one unit), and then Golden Gate assembly (insertion of parts into our plasmid backbone). With our system assembled, we planned to test its functionality using Disc diffusion tests of inhibition, and the “GFP Assay” described in Figure 5.
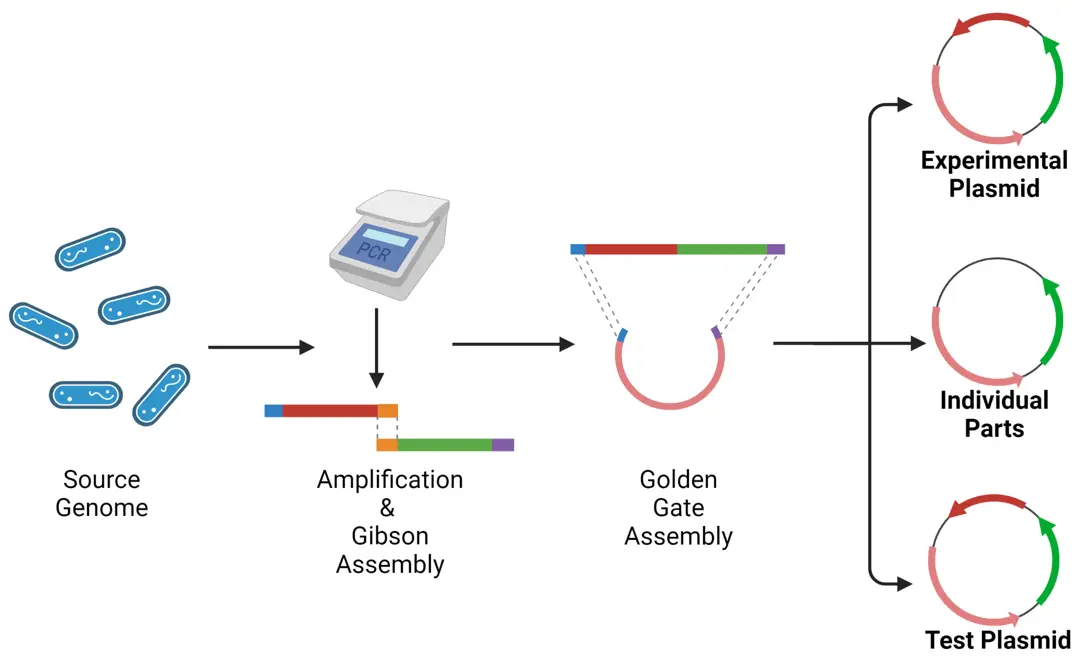
Unanticipated challenges have introduced many reassessments and optimization steps in the workflow. While the project was initially projected to progress linearly, problem solving, research, and re-designing has made this process a cyclical work in progress wherein re-evaluation and feedback into our design and project was valued.
Assembly Methods
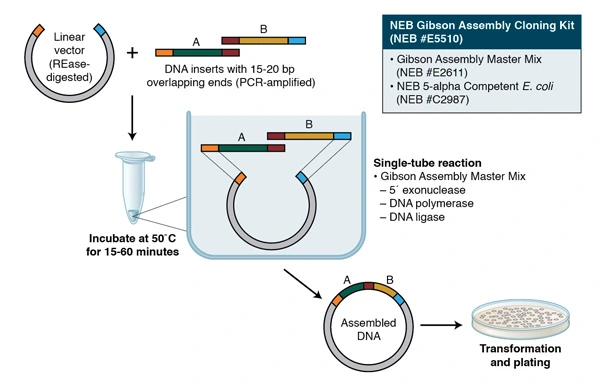
PCR reactions might have a length-limited, optimal amplicon. There are a number of strategies employed to improve the accuracy of this process as fragment size increases. However, none were adequate for the size of our toxin genes (BMD), the largest of which measured nearly 40 KB in length. Gibson assembly, in contrast, is the perfect tool for the assembly of large gene fragments, avoiding many problems associated with lengthy PCR reactions (Gibson et al., 2009). Furthermore, Gibson assembly is able to unify multiple DNA fragments without Scar introduction; a critical benefit for protein coding domains (Gibson et al., 2009).
Gibson relies on multiple forward and reverse primer sets along a single piece of DNA to create overlapping fragments during the PCR, Figure 1b. These fragments are then digested and ligated, creating a single fragment, Figure 1b. Due to the size of our toxin genes, nearly 46kb, we decided gibson assembly would be an optimal method for this project. Although this method is perfect for isolating GOIs, there are superior options for rapid subcloning and creation of transcription units; Golden Gate cloning being our preferred method.
Golden gate cloning relies on recognition sites for Type 2s enzymes, which cleave a known distance downstream of their binding sites; in a known orientation. Therein lies the utility, you can add their recognition and cleavage sites to a series of DNA fragments, allowing precise assembly of multiple parts in a single reaction. To be clear, since the downstream distance is the only determinant for overhangs, the cut sites can be designed so multiple fragments have compatible sticky ends (Marillonnet and Grützner, 2020). See Figure 2.
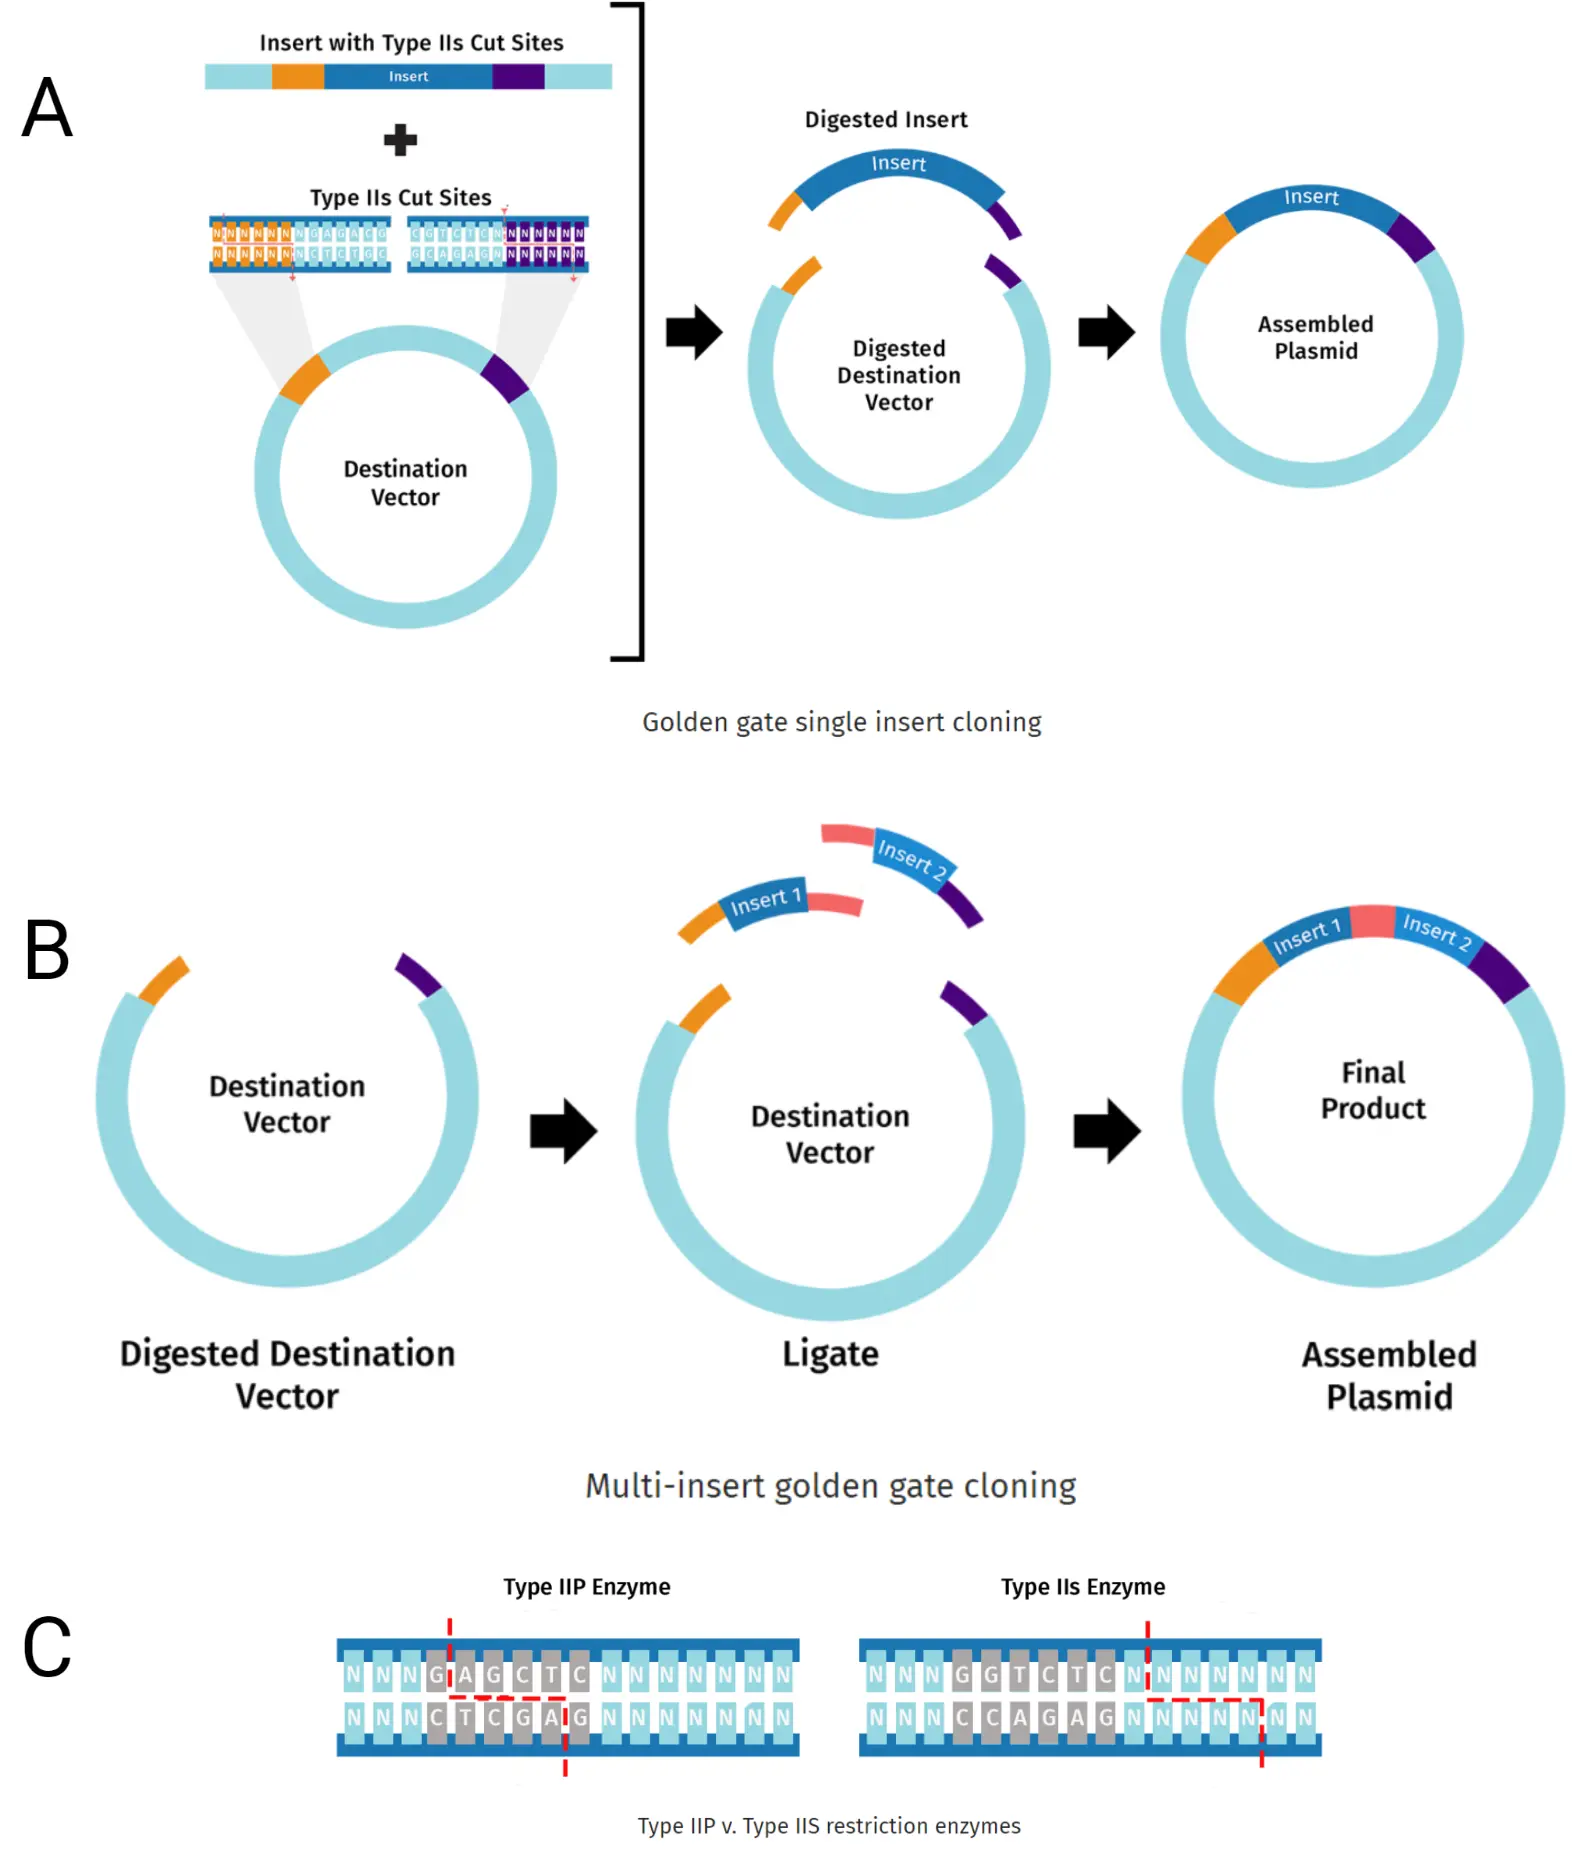
Within any genomic strand of DNA there are likely a handful of Type 2s recognition sequences. This becomes problematic during the assembly phase because although your parts contain appropriate ends, they are cleaved in various regions, which can greatly hinder the success of your golden gate reaction. Therefore, parts must have their internal recognition site removed; a process called domestication. (Püllmann et al., 2019). This is why our initial amplification step described in the workflow section above required our primers to perform multiple functions simultaneously.
Proposed Function and Mechanism
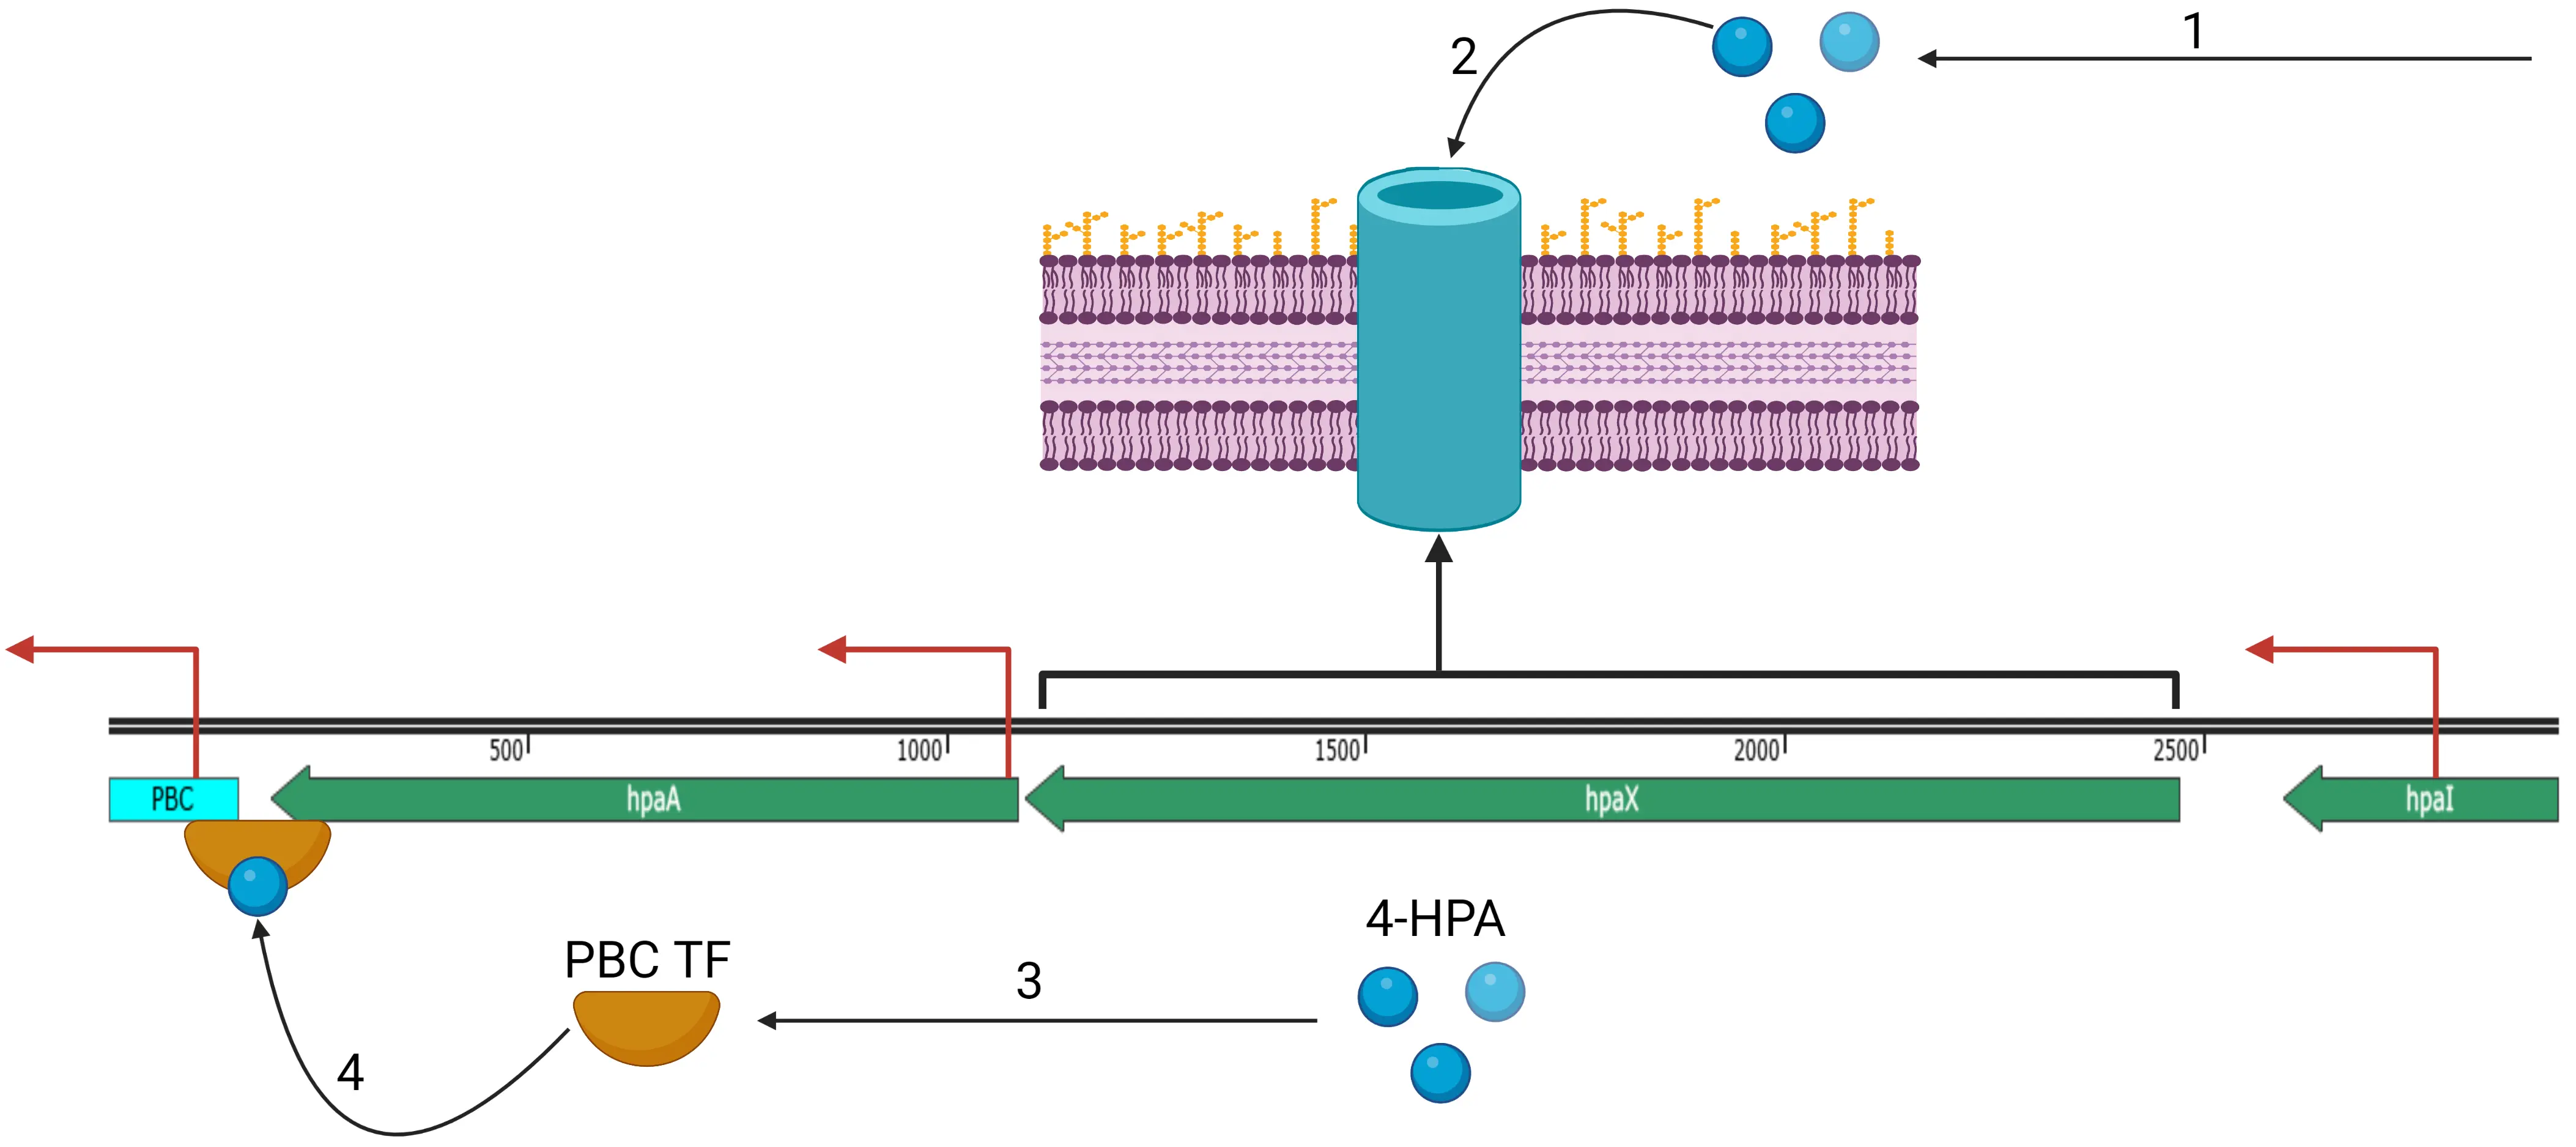
The molecular mechanisms of our circuit are described in Figure 4. To summarize, 4-HPA is imported into the cell by HpaX (depicted as a transmembrane channel protein, its actual facilitator mechanism is not known) where it associates with the HpaA protein, activating transcription of anything downstream of PBC.
Testing
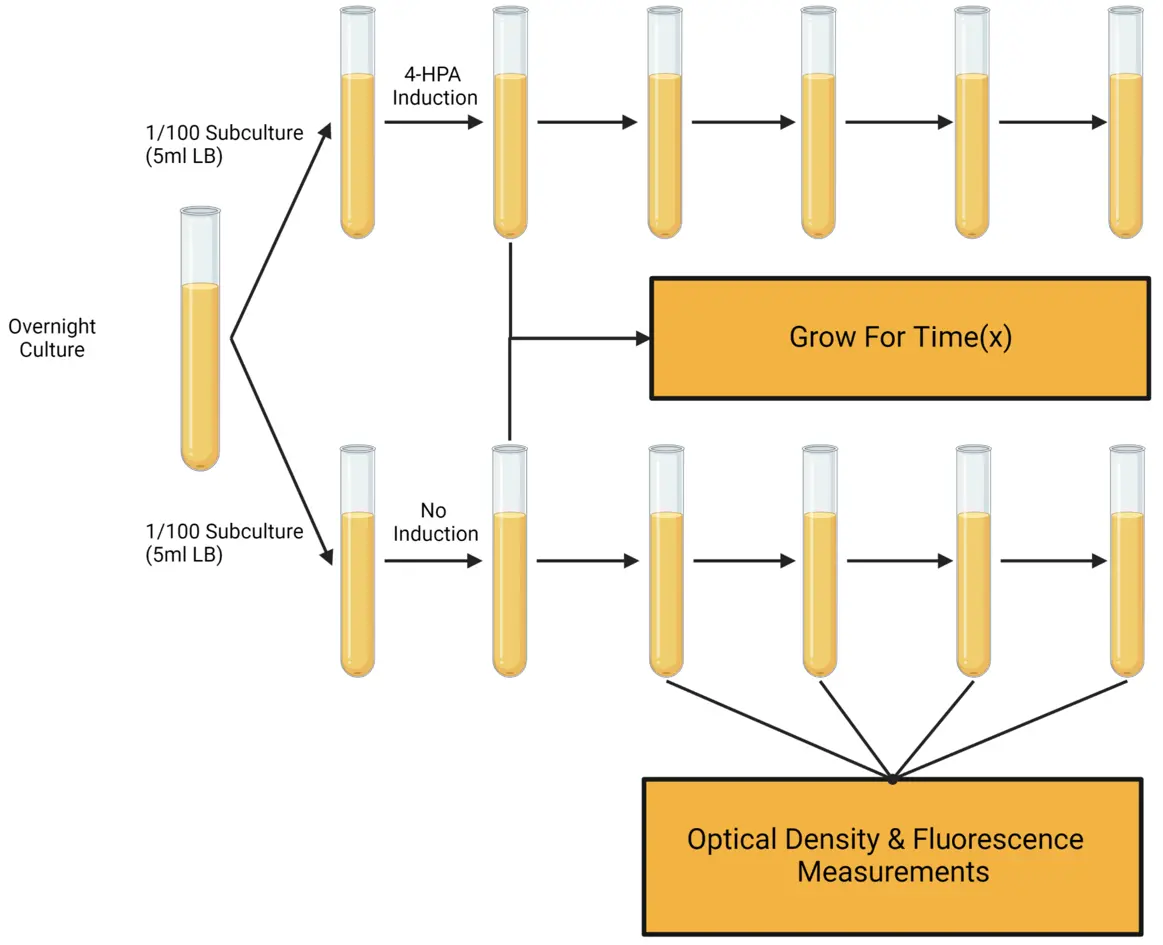
To test the functionality of our circuit after 4-HPA induction we planned to use a “GFP Assay”, described in Figure 5. By comparing optical density and fluorescence at various stages of induction, we had hoped to determine: 1. If the circuit was functioning, 2. Its transcription strength, and 3. Rate of transcription. The planned numerical comparison may have provided us a quantitative, rather than qualitative measure of induction activity over time.
Citations
Gibson, D., Young, L., Chuang, R., Venter, J., Hutchison, C., and Smith, H. (2009) Enzymatic assembly of DNA molecules up to several hundred kilobases. Nature Methods 6: 343-345.
Marillonnet, S., and Grützner, R. (2020) Synthetic DNA Assembly Using Golden Gate Cloning and the Hierarchical Modular Cloning Pipeline. Current Protocols in Molecular Biology 130.
Püllmann, P., Ulpinnis, C., Marillonnet, S., Gruetzner, R., Neumann, S., and Weissenborn, M. (2019) Golden Mutagenesis: An efficient multi-site-saturation mutagenesis approach by Golden Gate cloning with automated primer design. Scientific Reports 9.